A Complete Beginner Violin Guide: What You Need, What to Learn First, and How to Actually Improve
Learning violin can feel overwhelming at first. Maybe you saw a performance online, stumbled across violin content on social media, or finally decided to act on something you have wanted to do for years. Then the questions start piling up fast.
What do I actually need? Is violin hard to learn? Where do I even begin?
If you searched for how to play violin, you are in the right place. This complete beginner violin guide walks through everything you need to know before you start: what to buy, how to hold a violin, what to practice first, and how to keep improving when progress feels slow.
In this guide you will learn:
- What you need to start violin
- The parts of a violin
- How to hold a violin correctly
- How to hold a violin bow
- What beginners learn in their first weeks
- How often to practice
- Common beginner mistakes to avoid
- What nobody tells you about learning violin
New to violin? Before you dive in, start with my complete Violin Anatomy Chart so you already know the parts of your instrument before your first practice session.
Is Violin Hard to Learn?
Most beginners ask this question before they ever pick up the instrument. The honest answer is that violin can feel difficult at the start, but difficult does not mean impossible.
Violin is demanding because it asks your brain and body to coordinate several things at the same time:
- Posture and body position
- Left hand finger placement
- Bow pressure and bow speed
- Rhythm and timing
- Listening and adjusting your pitch in real time
That is a lot to build from zero. The early sounds are not always pretty. Many beginners produce a scratchy tone in the first weeks, and that is completely normal. It does not mean you are doing it wrong it means your bow arm is still developing the muscle memory it needs.
Progress on violin tends to feel slow at first. You might practice for a week and feel like nothing is improving. Sadly it does take time to feel as though you are making progress. Sometimes one day something clicks, and sometimes it doesn’t. That pattern (slow build, then sudden progress) happens to almost every violin student as they are learning.
The bottom line: Violin rewards consistency over everything else. The goal at the beginning is not to sound professional. The goal is to show up, build good habits, and trust the process.
What You Need Before You Start Playing Violin
You do not need a room full of equipment to begin, but a few things make a real difference from day one.
The Essentials
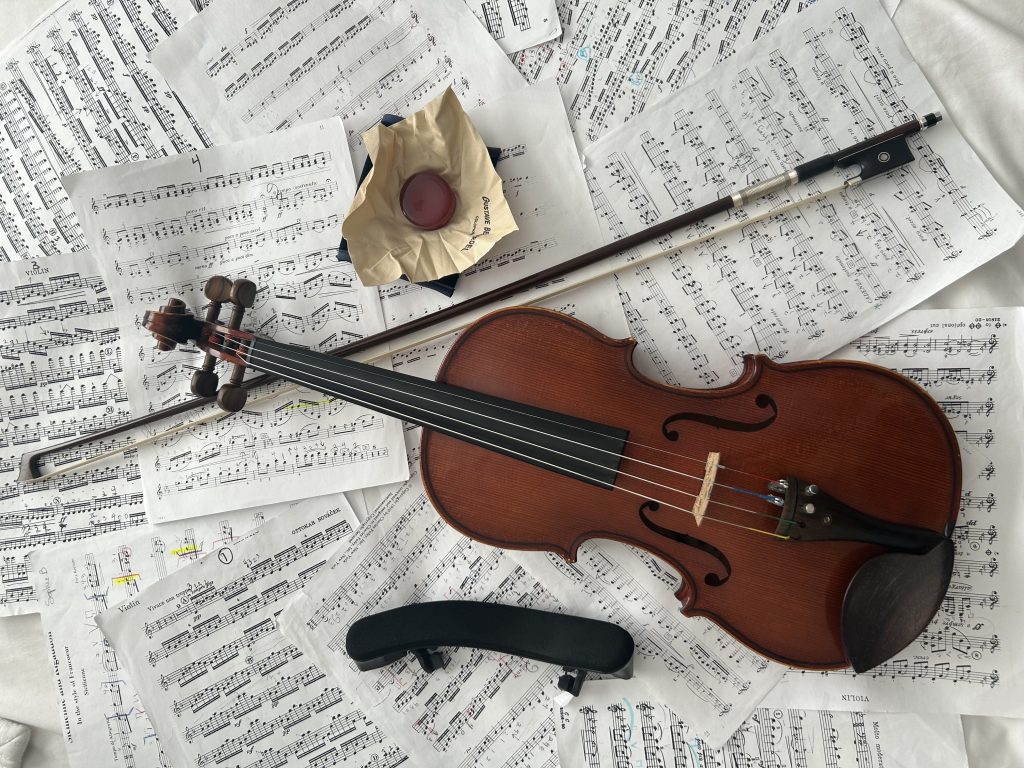
- Violin — Your first violin does not need to be expensive, but it should be playable. A poorly set up violin that constantly slips out of tune makes learning much harder. Look for a reputable beginner outfit from a trusted music retailer. Also check the size: violins come in fractional sizes (1/2, 3/4, full 4/4), so make sure you have the right fit for your body.
- Bow — Most beginner violins come with a bow included. Make sure the bow hair is not frayed and that the stick has a slight curve toward the hair when tightened.
- Rosin — Rosin is a resin you apply to the bow hair before playing. Without it, the bow slides across the strings without gripping and produces little to no sound. Apply it every 3-5 hours of practice time.
- Shoulder rest — Attaches to the back of the violin and supports the instrument so your left hand does not have to hold it up. Most beginners find it makes posture much more comfortable.
- Tuner — Practicing on an out-of-tune violin makes everything harder, including ear training. A clip-on chromatic tuner is simple and affordable.
- Case — Protects your instrument from humidity, drops, and dust when you are not playing.
Helpful Extras
- Music stand — keeps sheet music at eye level and helps you maintain good posture
- Beginner method book — Suzuki or Essential Elements for Strings are popular starting points
- Practice notebook — write down what you worked on so home practice stays focused
- Pencil — mark fingerings and bowings in your music (never use pen)
Still putting together your setup? Read my Beginner Violin Essentials Guide for a full breakdown of everything you need before your first lesson.
Learn the Parts of a Violin First
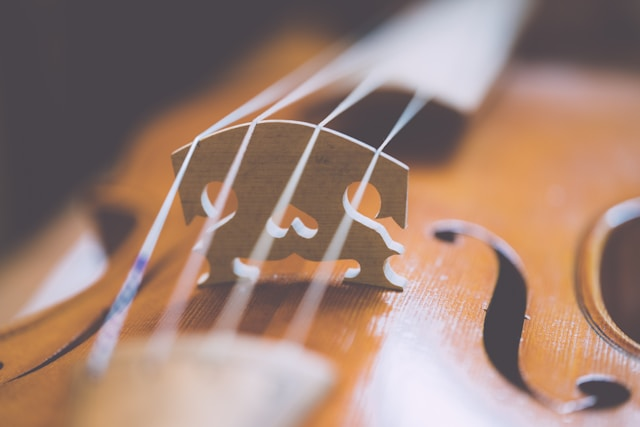
Knowing what everything is called makes it much easier to follow instructions from teachers, tutorials, and method books. Here are the key parts every beginner should know:
- Strings — A violin has four strings tuned to G, D, A, and E from lowest to highest. The E string is the thinnest and highest-pitched. The G string is the thickest and lowest-pitched.
- Fingerboard — The long black strip along the neck. Your left hand fingers press down here to change the pitch of each note.
- Bridge — The small wooden piece standing upright near the center of the body. It supports the strings and transfers vibration into the instrument to create sound. It is not glued down, so it can fall if the strings go completely slack.
- Chin rest — Attached to the lower left side of the body. It gives your jaw and chin a stable resting place. Different shapes work better for different face structures.
- Scroll — The decorative curl at the very top of the neck. It does not affect sound, but it is one of the most iconic features of the instrument.
- Pegs and fine tuners — Pegs are the wooden knobs at the top used for large tuning adjustments. Fine tuners are the small metal adjusters near the tailpiece for small corrections. Most beginners stick to fine tuners.
- Bow — A separate piece of equipment made from a wooden stick with horsehair stretched from end to end. It creates sound by vibrating the strings when drawn across them.
How to Hold a Violin Correctly
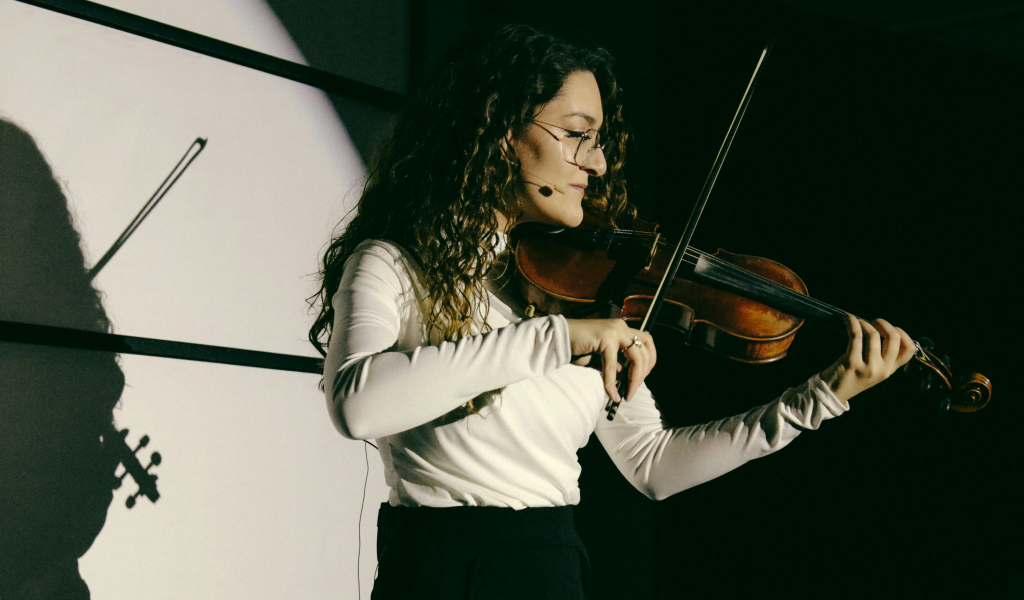
Posture is one of the first and most important skills you build on violin. Good posture from the beginning prevents bad habits that can take months to undo.
Follow these steps to build correct posture:
- Stand or sit up straight with your shoulders relaxed
- Place the violin on your left collarbone, extending out to your left
- Rest your chin and jaw on the chin rest — the violin should feel supported by your collarbone and jaw, not your left hand
- Keep your left elbow tucked slightly under the body of the violin
- Keep your left wrist straight — not bent inward or outward
- Curve your fingers so they approach the strings from above
Common posture mistakes to watch for:
- Gripping the neck with your left hand to hold the instrument up
- Raising or tensing your shoulders
- Bending your left wrist inward
- Leaning forward or hunching
At first this position will feel strange. Your neck might feel stiff and your shoulder might creep up, and that is completely normal. The position becomes natural with time and consistent practice.
How to Hold a Violin Bow
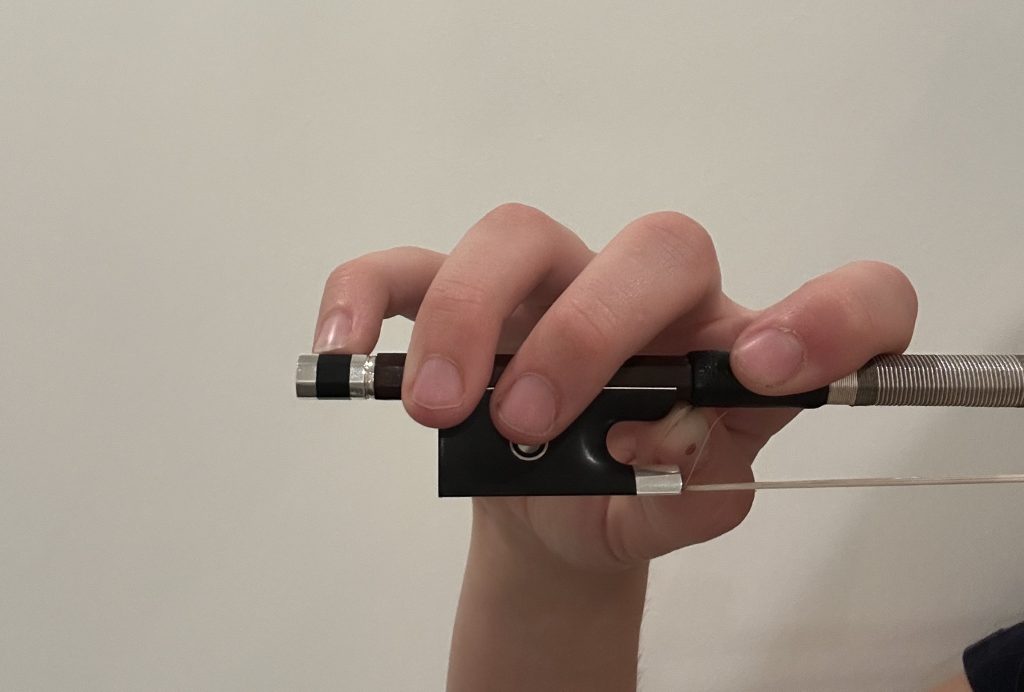
If violin posture feels awkward, the bow hold will feel even more foreign at first. Most people have never held anything quite like a violin bow, and the muscles it uses are ones most people rarely think about.
A good beginner bow hold has four key qualities:
- Flexible
- Relaxed
- Balanced
- Curved (no locked or straight fingers)
Here is how to build it finger by finger:
- Thumb — Place it on the underside of the bow stick just below the frog (the black piece at the base). Keep it slightly bent, not locked straight. A curved thumb acts as a shock absorber.
- Index finger — Rest it on top of the bow stick between the first and second knuckle. This finger controls bow pressure — more weight here creates a fuller, louder tone.
- Middle and ring fingers — Drape these over the top of the bow stick. Their job is support and stability.
- Pinky — Rests curved on top of the stick near the end of the bow. It helps counterbalance the weight of the bow.
Remember: The bow should feel balanced in your fingers — not squeezed. A tight grip creates tension, produces a harsh tone, and makes smooth bow changes harder.
Tip: Practice your bow hold away from the violin first. Try holding a pencil the same way to get used to the finger positions before adding the instrument.
Need a visual? Check out my Violin Bow Chart for a step-by-step diagram of correct bow hold finger placement.
Your First Weeks Learning Beginner Violin

Most beginners want to jump straight into songs — and that is understandable. But the first few weeks are really about building the physical foundation everything else depends on. Here is a realistic look at what your first month might look like:
Week One
- Focus on holding the violin with correct posture
- Work on your bow hold before drawing it across strings (a pencil can be used for this before even using the actual bow)
- Practice drawing the bow across open strings (no left hand yet)
- Listen to your tone — experiment with bow pressure and bow speed
- Goal: produce a clear, consistent tone on each string
Week Two
- Add your left hand — start with first finger on the A and D strings
- Place fingers directly behind finger tapes or markers on the fingerboard
- Practice coordinating your left finger pressing down with the bow moving across the string
- Clap or tap rhythms before playing them — understanding rhythm in your body first makes it easier on the instrument
Weeks Three and Four
- Begin playing short, simple songs from your method book
- Focus on keeping posture intact while coordinating both hands
- Practice every day, even if only for 15 minutes — students who practice daily at this stage improve noticeably faster
How Often Should Beginners Practice?
This is one of the most common questions beginner violin players ask — and the answer might surprise you.
You do not need to practice for hours to improve. Long, unfocused practice sessions often do more harm than good at the beginner stage because fatigue leads to sloppy habits.
The recommended starting point: 15 to 30 minutes of focused practice per day.
Here is a simple structure that works well for beginners:
| Practice Block | Time | Focus |
|---|---|---|
| Warm up | 3–5 min | Long bows on open strings, tone production |
| Technique | 5–10 min | Scales, bow exercises, finger placement |
| New material | 5–10 min | New notes, rhythms, or pieces |
| Review | 5 min | Something you already know — build confidence |
Why daily practice beats long sessions:
- Your brain builds muscle memory through repetition over time, not through marathon sessions
- Short daily practice keeps your hands and ears engaged consistently
- Fatigue during long sessions leads to sloppy technique that reinforces bad habits
As you advance, your practice time will grow naturally. But at the beginner stage, consistency is the goal, not necessarily the duration time of your practicing.
Common Beginner Violin Mistakes
Almost every beginner makes the same set of mistakes. Knowing what they are in advance helps you catch them before they become habits.
- Gripping the bow too tightly — The most common mistake. A tight grip restricts movement, creates a harsh tone, and can lead to tension injuries over time. Check your bow hold regularly and consciously relax your hand.
- Rushing through practice — Slow practice is not lazy practice. It is how your brain builds accurate muscle memory. If you always practice at full speed, you reinforce every mistake at that speed. Slow down, play it correctly, then gradually speed back up.
- Ignoring posture — Posture feels less exciting than playing songs, so beginners let it slide. Poor posture causes tension, limits range of motion, and can cause physical strain. Check yours at the start of every practice session.
- Skipping tuning — Practicing on an out-of-tune violin trains your ear to accept wrong pitch. Always tune before you start.
- Comparing yourself to social media — Violinists online are showing polished, edited performances that represent years of work. They are not showing their bad practice days, frustrating plateaus, or how long it actually took to get there.
What Nobody Tells You About Learning Violin
Here is the honest version of what learning violin actually feels like — the part most guides leave out.
You are going to sound bad at first. Not a little rough — genuinely difficult to listen to. That is not a sign you are failing or that you lack talent. It is a sign you are a beginner, and every single professional violinist went through the exact same phase.
Progress will feel invisible for stretches of time. You will practice the same thing for days and feel like nothing is changing. Then one morning you will suddenly be able to play something that felt impossible the week before. The improvement is happening even when you cannot feel it.
The awkward phase is real, and it lasts a while. Here is what to expect:
- Holding the violin will feel uncomfortable
- The bow hold will feel unnatural
- Coordinating both hands will feel impossible at first
- Your shoulder will want to creep up constantly
None of that means you are doing it wrong. It means your nervous system is building new pathways, and that takes time.
Social media is not the full picture. The players you admire online have practiced tens of thousands of hours to make it look effortless. What you see is not natural gift — it is the result of consistent, long-term work.
The most important thing you can do as a beginner is stay in the game long enough for things to start clicking. Most people who quit do so in the first three months — right before the moment when it would have started to feel rewarding.
Frequently Asked Questions About Playing Violin
Am I too old to start violin? No. People successfully begin violin as teenagers, adults, and even retirees. Adults often have real advantages — discipline, focus, and genuine motivation. Your goals may look different from a child prodigy’s, but progress is absolutely possible at any age.
Can I teach myself violin? You can learn the basics independently through method books, apps, and video lessons. However, self-teaching makes it harder to catch posture and technique problems early, and bad habits are difficult to undo later. Even occasional lessons with a teacher can make a significant difference.
How long does it take to get good at violin? It depends on what “good” means to you and how consistently you practice. Most students who practice daily can play simple songs within a few months. Playing intermediate repertoire confidently often takes two to three years. The timeline varies widely based on consistency, instruction quality, and natural aptitude.
How long should beginners practice each day? 15 to 30 minutes of focused daily practice is a solid starting point. Short, consistent sessions beat long, infrequent ones at every stage of learning.
Is violin harder than piano? Many people find violin harder to start because there are no visual pitch markers like piano keys. You have to develop your ear and place your fingers in exactly the right position on an unmarked fingerboard. Piano has a more intuitive visual layout for beginners — but both instruments require significant practice to play well.
Final Thoughts
Learning how to play violin does not happen overnight, and it does not happen in a straight line.
Here is what matters most as a beginner:
- Start with posture — build the right foundation from day one
- Learn your instrument — know what everything is called and why it matters
- Build a relaxed bow hold — flexibility beats tension every time
- Practice consistently — even 15 minutes a day makes a real difference
- Be patient with yourself — the awkward phase is part of the process, not a sign to quit
Small improvements add up faster than you think. The scratchy sound of week one becomes recognizable notes by week three. The awkward bow hold of the first month starts to feel natural by month three.
The most important step is the one right in front of you — just start.
Ready for your next step? Explore my resource recommendations to see what music materials I have tried, tested, and approve of that can step up your practicing game.