Learning the basics of violin anatomy
If you’re starting violin lessons, it’s normal to feel overwhelmed by the instrument itself. Violins look simple at first glance, but they are made up of many small parts, each with a specific job. When teachers use words like “bridge,” “peg,” or “fingerboard,” beginners often nod along without fully understanding what those terms mean.
That confusion can make learning feel harder than it needs to be.
Understanding the parts of a violin helps students:
- Follow lesson instructions more easily
- Care for the instrument properly
- Communicate clearly with their teacher
- Feel more confident during practice
You don’t need to memorize every term on day one, but having a basic understanding of what each part does and why it matters makes violin lessons smoother and less intimidating.
This beginner-friendly guide breaks down the main parts of a violin in simple terms, so you know what you’re looking at, touching, and adjusting every time you practice.
Worried about how your first lesson is going to go? Read “What to Expect at Your First Violin Lesson”
The Body of the Violin
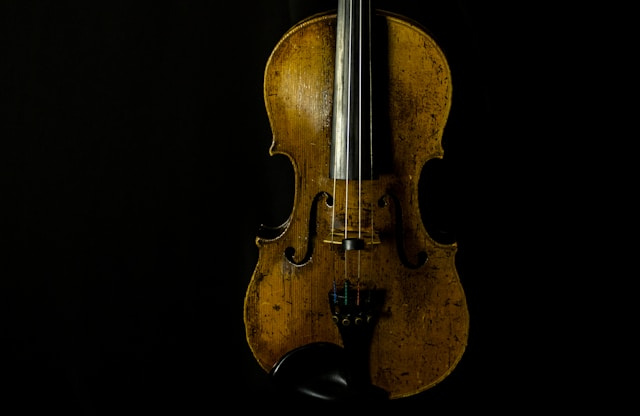
The body of the violin is the wooden structure that amplifies sound. Most violins are made from spruce and maple, chosen for their ability to vibrate and project sound clearly.
Top Plate (Soundboard)
The top plate, also called the soundboard, is the front of the violin. It plays a major role in sound production.
What it does:
- Vibrates when the strings are played
- Helps project sound outward
- Works with the bridge and sound post to shape tone
The top plate is delicate, which is why teachers emphasize gentle handling and proper storage.
Back Plate
The back plate is the back side of the violin body.
What it does:
- Reflects and enhances sound vibrations
- Contributes to the overall tone quality
While beginners don’t need to worry about wood types here, this part helps give each violin its unique sound.
Ribs (Sides)
The ribs are the curved sides that connect the top and back plates.
What they do:
- Hold the violin’s shape
- Create the hollow space needed for sound resonance
Though they don’t get much attention, ribs are essential to sound projection.
F-Holes
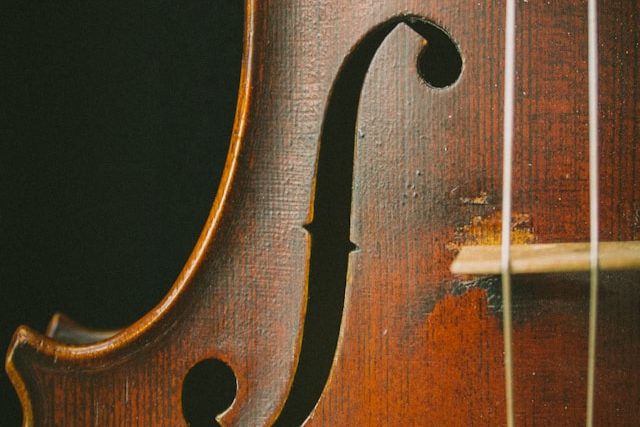
The two f-shaped openings on the front of the violin are called f-holes.
What they do:
- Allow sound to escape from the violin body
- Help regulate airflow and resonance
These openings are one reason the violin projects sound so efficiently, even without amplification. The f shape they are in has been the way violins have been made since the renaissance, and helps maximize the acoustic effects of the instrument.
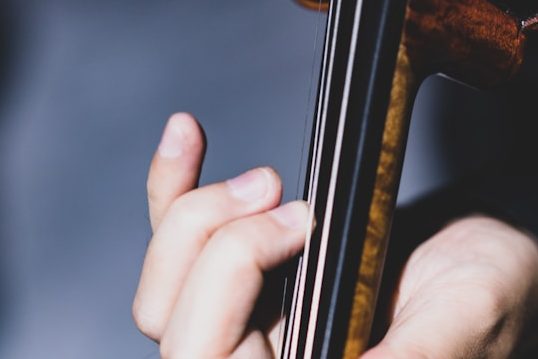
The Neck and Fingerboard Area
This section of the violin is where the left hand works. Beginners spend a lot of time learning how to use these parts comfortably and correctly. The way they learn can depend on what violin teaching method their violin teacher uses. Discover “Common Violin Teaching Methods.”
Neck
The neck is the wooden piece that connects the body of the violin to the scroll.
What it does:
- Supports the fingerboard
- Provides a stable surface for the left hand
Students should never grip the neck tightly. Teachers emphasize relaxed support to prevent tension.
Fingerboard
The fingerboard is the smooth, black surface where the fingers press the strings.
What it does:
- Allows the player to change pitch
- Guides finger placement for notes
Unlike fretted instruments like guitars, violins do not have markings. Beginners rely on listening, muscle memory, and teacher guidance to learn finger placement.
Nut
The nut is a small raised piece at the far end of the fingerboard.
What it does:
- Holds the strings in place
- Sets the spacing and height of the strings
The nut affects comfort and tuning stability, even though it’s small and easy to overlook.
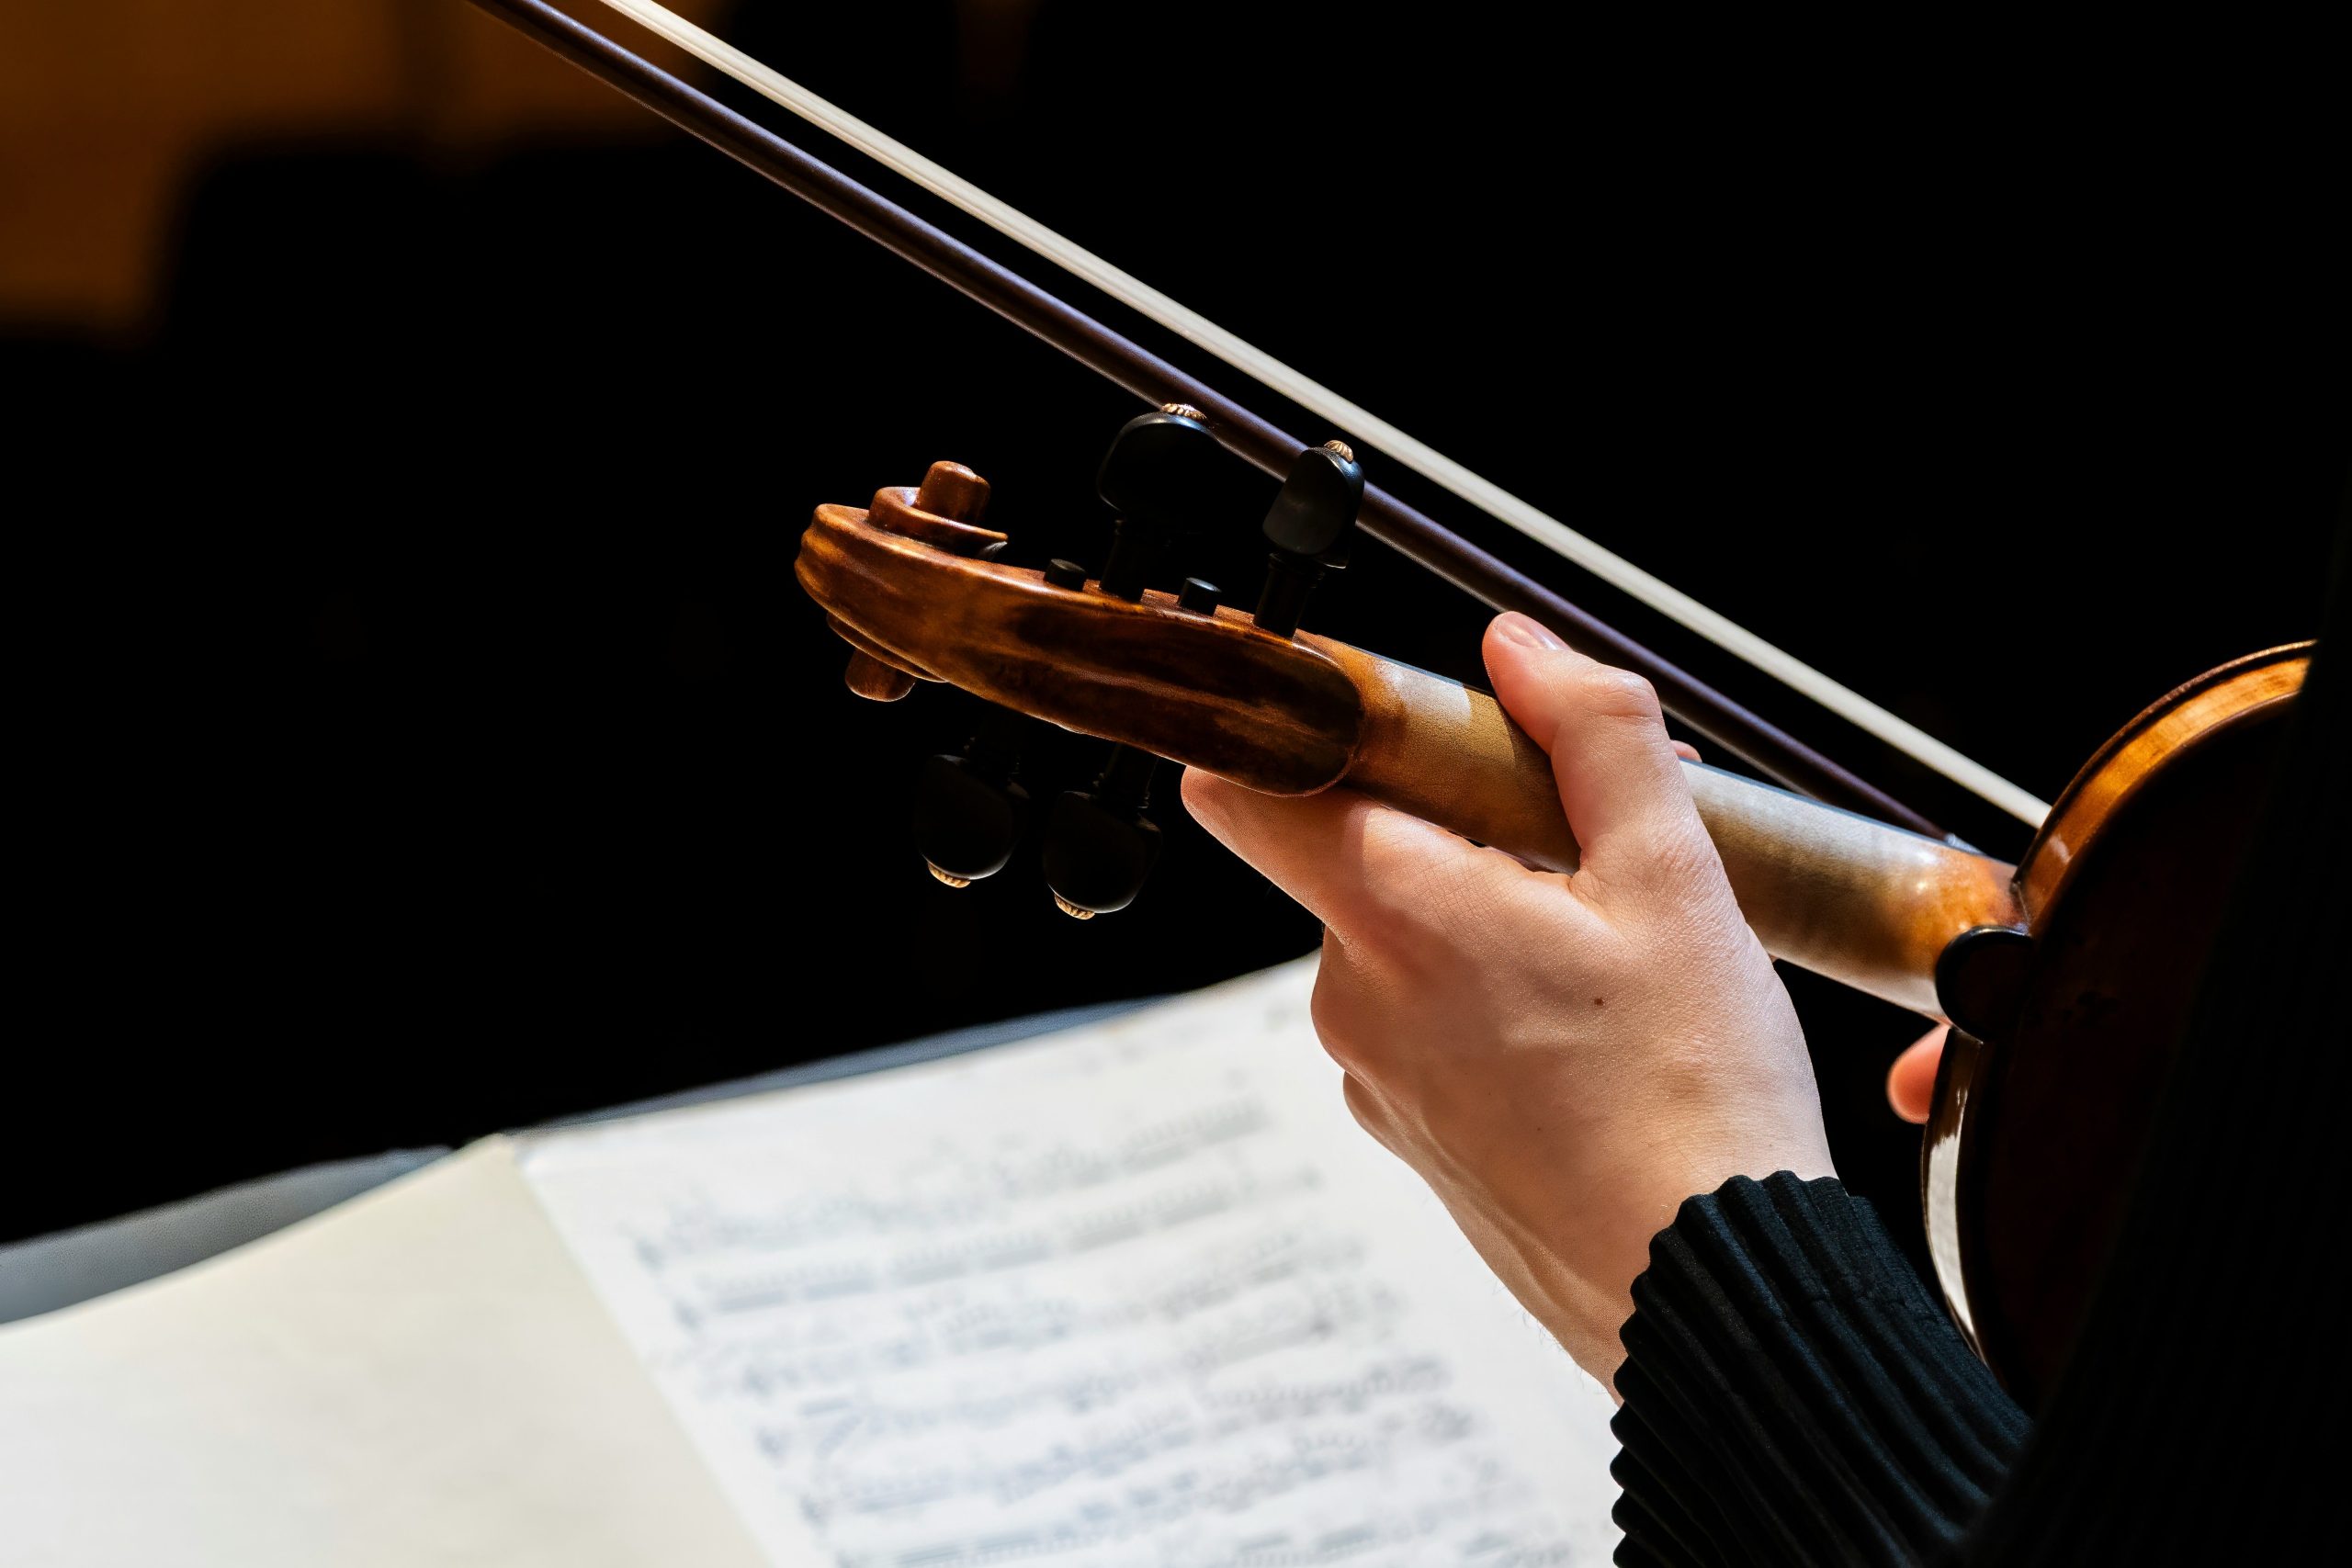
The Scroll and Tuning System
This part of the violin handles tuning and string tension.
Scroll
The scroll is the decorative spiral at the top of the violin.
What it does:
- Holds the pegs
- Balances the instrument
The scroll is mostly decorative, but it also helps distribute weight properly.
Pegs
Pegs are the wooden knobs used to tune the violin.
What they do:
- Adjust string tension
- Control overall pitch
Beginners often struggle with pegs because they can slip or stick. Teachers usually handle peg tuning at first, while students use fine tuners.
Pegbox
The pegbox is the hollow area that holds the pegs.
What it does:
- Houses the tuning system
- Keeps strings aligned
Pegs fit tightly into the pegbox to stay in tune.
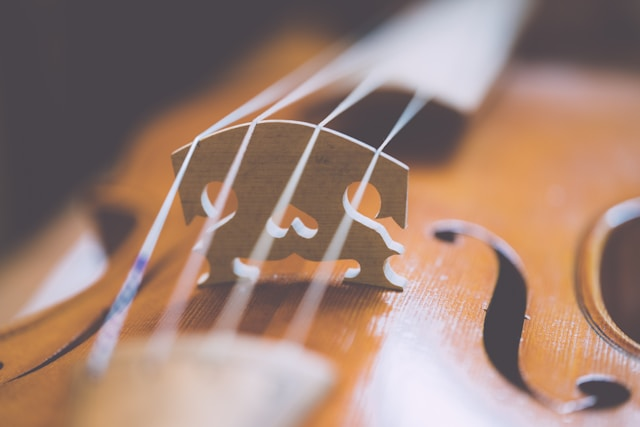
The Bridge and Sound Production
This area of the violin is critical for tone and playability.
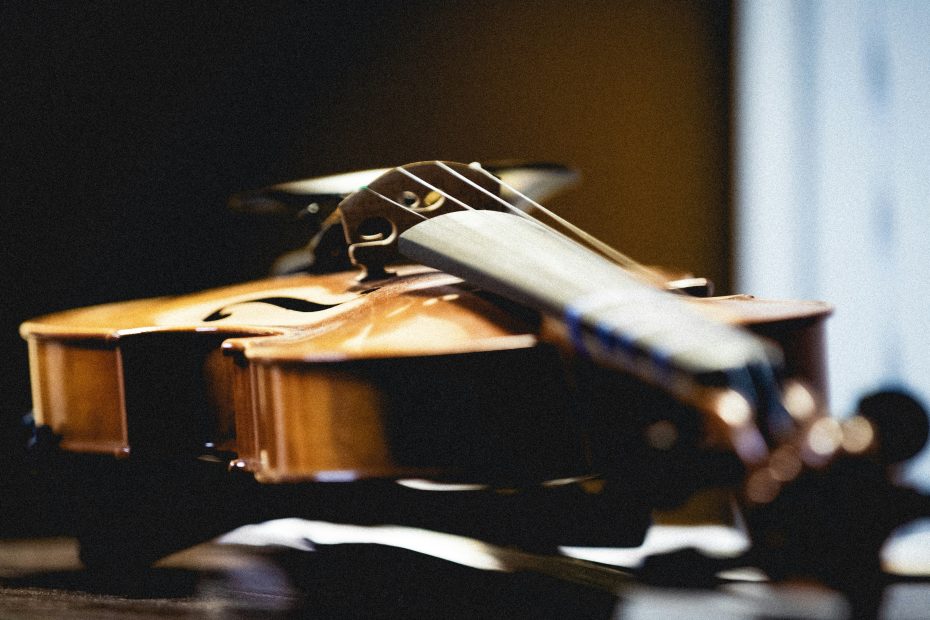
Bridge
The bridge is the thin wooden piece that stands upright on the violin.
What it does:
- Holds the strings at the correct height above the fingerboard
- Transfers vibrations from the strings to the body of the violin
The bridge is not glued down. If it falls (which does happen), do not attempt to fix it yourself, you should always ask a teacher or shop. The bridge can also not fall completely, but get crooked or tilted slightly. If you notice this, you can also ask your teacher or professional and they can help adjust it back for you.
Sound Post
The sound post is a small wooden dowel inside the violin, positioned under the bridge.
What it does:
- Supports the top plate
- Balances sound across strings
- Affects tone quality
This part is invisible but extremely important. Adjustments should only be done by professionals.
The Strings
Violins typically have four strings: G, D, A, and E.
What they do:
- Produce sound when bowed or plucked
- Vibrate at different pitches
Beginner violin strings are designed to be stable and forgiving. Strings wear out over time and need replacement.
The Tailpiece and Accessories

Tailpiece
The tailpiece anchors the strings at the bottom of the violin.
What it does:
- Holds string tension
- Works with fine tuners
Fine Tuners
Fine tuners are small screws on the tailpiece.
What they do:
- Allow small tuning adjustments
- Make tuning easier for beginners
Most beginner violins have fine tuners on all strings. The more professional the violin and the student, typically the less fine tuners you have (most professional violinists only have one on the E string).
Less fine tuners drop weight, increase resonance and sound quality, and can help prevent buzzing. Most professional violinists are also highly trained in how to tune their instrument just using pegs, so fine tuners are less needed.
Chin Rest
The chin rest is attached to the lower bout of the violin.
What it does:
- Supports the chin and jaw
- Improves comfort and stability
Chin rests come in different shapes, and the placement can be adjusted as well. In the past, chinrests were placed off to the side. But, it is becoming more common to see more centered chin rests which can help reduce the stress violin playing position puts on your body. Centered chin rests may look a little funky, but remember comfort matters more than appearance. Neither traditional or centered placement is technically better, it will just depend on your preference.
Why Knowing the Parts of a Violin Matters
When students understand their instrument, violin lessons become less confusing and more productive. Teachers can give clearer instructions, and students can take better care of their instruments.
This knowledge builds confidence and reduces frustration—especially in the early months.
Final Thoughts for Beginners
You don’t need to memorize every violin part right away. Learning happens gradually. But knowing the basics helps you feel more comfortable, prepared, and in control.
Violin lessons are a process. Understanding your instrument is one of the first steps toward long-term success. Another way you can improve is by being prepped and ready for your next lesson. Make sure you have all the essential materials to start violin lessons by reading “Essentials You Need For Your First Violin Lesson”